Pages

Wednesday, December 29, 2010

Green Tea Tiramisu


When I first saw this recipe here, I thought 'How ingenious! How come I've never thought of that?' I've eaten green tea ice cream, green tea mochi, green tea chiffon cake, green tea butter cake but GREEN TEA TIRAMISU? How interesting! I knew instantly I had to make it ... and I made it just in time for a family reunion potluck dinner.


I was afraid the cake would not hold up well and fall apart after unmoulding (it would've been a total disaster!), so I brought the cake to the potluck still in its tin.


Ta-daaa! Just before serving, I removed the tin with the help of  2 or maybe 3 other persons, I couldn't exactly remember, my mind was fuzzy as I concentrated hard not to ruin the cake whilst unmoulding. Phew! It was intense! LOL! I must admit the cake looked pretty good except for the icky green which my Daughter said looked like algae!.


This was how it looked like inside. It tasted very light and the green tea flavour was refreshing and very mild. I just wish I had sprinkled green tea powder on every layer of the sponge fingers for a stronger green tea taste.


Green Tea Tiramisu
(Recipe adapted from the blog "The Scent of Green Bananas" here)

Ingredients:
3 egg yolks
1/3 cup white caster sugar (I've reduced the sugar by 2 tablespoons)
8oz mascarpone cheese
1 cup dairy whipping cream
1 tsp vanilla extract
cointreau, or any orange flavoured liqueur (I've omitted this and replaced with the juice of half a lemon)
green tea powder
1-2 c brewed strong green tea, cooled
3 egg whites
savoiardi (sponge fingers)

Note:
1) I used an 8 inch round removable base cake tin as the mould. There was about 1/3 cup leftover filling. I used about 36 pieces of sponge fingers.
2) To the 1 cup dairy whipping cream, I've added 2 Tbs icing sugar and 2 Tbs piping gel during whipping. This is to stabilize the whipped cream.
3) To tone down the bitterness of the green tea powder, I've mixed  in some icing sugar prior to dusting the top of the cake. Due to condensation (hot humid weather here), the mixture melted .... and became 'icky green algae'! LOL!

Method:
1. Beat the egg yolks and sugar in a bowl set over pan of simmering water, until pale yellow. Remove from heat and add the mascarpone cheese and beat until smooth and creamy. Do not overbeat!
2. In a separate bowl, whip the cream. Add vanilla and orange liqueur, then fold into the mascarpone mixture and blend well.
3. In yet another bowl, beat the egg whites to stiff peaks. Fold gently into creamy mascarpone mixture. 
4. Dip sponge fingers into the brewed green tea, then layer them on the bottom of a serving dish. Spread the creamy mascarpone mixture top, and repeat layers.
7. Refrigerate for at least a couple of hours or overnight.
8. Dust with green tea  powder just before serving.

Tuesday, December 28, 2010

Christmas Day Feast 2010


Our Christmas Day Feast.

Mom roasted the turkey, and I with the help of my Daughter (my Daughter insisted that I gave her credit and made known to everyone that she helped with peeling the asparagus! LOL!)  made the accompanying side dishes and dessert.


The star dish of the day, Mom's Roasted Turkey.

Believe it or not this turkey (between 6 - 6.5 kilos) took only 1 1/2 hours to cook in the microwave!  The turkey was moist and very tasty.  I asked Mom what she had used to marinate the turkey and she said "Pounded ginger and garlic, LOTS of garlic ... soy sauce, salt & pepper and a little bbq sauce".


Mom's recipe for Turkey Gravy

Ingredients:
Turkey Neck & Giblet
2 large Onions, chopped
Shitake Mushrooms, sliced and the stems removed and kept aside
Soy Sauce to taste
Salt & Pepper to taste
Drippings from roasted turkey, remove the fat first
Cornflour mixed with a little water


Method:
In a pot, put in turkey neck & giblet, chopped onions, mushroom stems and soy sauce. Scrape in the drippings from the roasted turkey. Pour in water enough to cover the ingredients in the pot. Boil away on medium heat until mushrooms have disintegrated. Add more water during cooking as necessary. Discard turkey neck & giblet. Add in the sliced mushrooms. Boil further until mushrooms are just cooked. Season well with salt & pepper. Add in  cornflour solution and cook further until gravy has thicken.


Jamie Oliver's Perfect Roast Potatoes
(with butter, garlic & rosemary)
(Recipe here)

This was the best side dish amongst all. It was very fragrant and flavourful with the rosemary and garlic. My dear Hubby who has been avoiding carbs couldn't resist eating this and even requested the lefovers for dinner. 


Cranberry Asparagus & Prosciutto 
(Recipe here . I've added prosciutto and omitted the pine nuts as I didn't have them on hand. I would suggest adding lightly sauteed garlic for more flavour). 


Insalata Caprese
(Recipe here)


To end our Christmas feast with a sweet note, Gordon Ramsay's Easy Tiramisu!
(Recipe here)

Monday, December 27, 2010

Christmas Eve Dinner 2010


Our simple Scandinavian-esque Christmas Eve Dinner.

For the past few years, we had dined out and spent a small fortune on Christmas Eve Dinners. This year I'm glad to have stayed at home and avoided the crowds and the overpriced dinners offered at most restaurants in town. It was enjoyable preparing the food and celebrating with my nearest and dearest ... right here at home.


Smoked Salmon Carpaccio
(Recipe here. I've added sliced onions and black olives and garnished with fresh dill instead of parsley.)

My Daughter loves this dish so much.


Bacon and Cream Cheese stuffed Mushrooms.
(Recipe here)

Very cheesy & rich! Reading back the recipe, I think I might have overstuffed the mushrooms.  The Bacon and Cream Cheese filling was meant for 25 mushrooms but I crammed all into 12 mushrooms only. LOL!Anyway, they were good eaten with toasted crusty garlic bread.


Butterhead Lettuce, Grape & Tomato Salad with Raspberry Dressing
(Recipe for Raspberry Dressing here)


 Nigella Lawson's Molten Chocolate Babycake.
(Recipe here)

We ended the meal with Nigella Lawsons's Molten Chocolate Babycake with Strawberries & Whipped Cream. It was plate licking good ... I really meant it literally! Yum!

Triple Chocolate Mousse Cake


Happy Birthday Mom!
My mom turned 59 on Boxing Day. 


A birthday is just not complete without a birthday cake, right?


Homemade birthday cake, Triple Chocolate Mousse Cake. It has 3 components ... chocolate sponge cake, chocolate mousse filling and chocolate ganache coating.

After finishing a slice, Mom declared, 'awfully chocolaty cake'! and proceeded with a second slice. :)


Triple Chocolate Mousse Cake.

Ingredients:

1) Chocolate Sponge Cake
    (recipe here)

* Note: I've halved the recipe to make a 7 inch round cake.


2) Chocolate Mousse Filling
    (recipe adapted from Alex Goh's 'Temptation of Chocolate")

*Note: I've used half portion only and added 1/2 tsp vanilla essence.

    100 g dark chocolate
    30 g sugar
    3 egg yolks
    250 g whipped dairy cream
   

Method:
1) Melt chocolate. Set aside.
2) In a double boiler or a bowl over simmering water, whisk together egg yolks and sugar until thicken and pale.
3) Remove egg yolks mixture from heat and combine with the melted chocolate. Leave to cool.
4) Mix chocolate mixture with whipped cream.


3) Chocolate Ganache Coating
    (recipe adapted from  Alex Goh's 'Temptation of Chocolate")

*Note: This amount provided more than enough coating for the cake. I reckon this amount can cover even a 9 inch round cake.

    150 g whipping cream
    250 g dark chocolate, chopped
    15 g butter

Method:
1) Heat whipping cream till almost boiling. Remove from heat.
2) Add chopped chocolate into the heated cream. Stir lightly until chocolate is completely melted.
3) Add in the butter and mix until combined.Leave aside to cool. It will thicken.

To assemble:
Split sponge cake in half. Place one layer  in a removable base cake tin or a cake ring. (At this point I brushed some Kahlua on the sponge. You can brush with any liquer you like or omit this step altogether. It's optional). Pour in the chocolate mousse filling. Top it with the second layer of sponge cake. Leave in the refrigerator to set for at least 6 hours. Remove cake from tin. Pour cooled chocolate ganache over cake. Decorate as desired. Put the chococolate covered ganache cake back into the refrigerator to set the ganache. Take cake out when it's time to cut cake. Do not leave cake out in room temperature for long duration or the mousse will melt and become one chocolaty mess. Enjoy!

Sunday, December 26, 2010

Tender Biscotti

Cranberry Pecan Biscotti

In past Christmas bakings, I've had my hand on gingerbread houses, stollens and gingerbread cupcakes. I've yet to make a fruit cake, yule log or mincemeat pies, all of  which are synonymous with Christmas. Maybe I'll attempt making them next Christmas, but this year I wanted to try making biscotti and decided to use a recipe adapted & tweaked from Christines's Recipe. Mind you, these are not the 'tooth-breaking' type of biscotti like those you'd normally find in Coffee Bean & Tea Leaf. These are crisp, buttery and tender, somewhat akin to shortbread, and crumbles easily  when you take a bite. Simply delish!


No dunking in coffee needed. Even my Grandmother enjoyed this with no problem!


Cranberry Pecan Biscotti

Ingredients:
70g salted butter
35 g catser sugar
35 g icing sugar
1/2 tsp vanilla essence
1 egg
125 g cake flour
1/4 tsp baking powder
50 g pecans, roughly chopped
50 g dried cranberries

Method:
1) Beat butter and sugar until pale and fluffy. Add in the vanilla essence and egg, mix well.
2) Sift cake flour together with baking powder, add into the butter mixture. Combine well.
3) Fold in the pecans and cranberries.
4) Wrap dough with clingfilm and shape into a rectangular log. Transfer to the fridge to let it  stiffen so that it can be easily transfered to the baking tray.
5) Remove dough from fridge and give it a final shaping, if  needed. Discard Clingfilm. Bake in a preheated oven at 160 °C for 35 minutes or until firm to the touch.
6) Transfer dough to cool for at least 10 minutes, then carefully slice into even fingers about 1 cm thick, thinner if you could without crumbling. Transfer the slices onto a baking tray and bake again at 150 °C for about 20 minutes or until dry and crisp.
7) Cool completely  on wire rack and keep in airtight container.


For easy handling, wrapped in clingfilm and shaped.

Removed from fridge and ready to be baked!

Sliced and baked a 2nd time.


I just love this recipe so much, I  gave it a further tweak to make Almond Cherry Biscotti. They turned out pretty good. Together with the Cranberry Pecan Biscotti, these were devoured in a pot luck dinner I brought to.  I think I will try making a chocolate version by adding cocoa powder, or maybe chocolate chips and walnuts, or white chocolate chips and cranberries, the variety is endless and up to your imagination really!


Almond Cherry Biscotti

 
In the spirit of Christmas joy and just for the fun of it,  I'm going to submit this post to 'Aspiring Bakers #2: Christmas (Dec 2010)' hosted by 'Passionate about Baking' here.
Happy Christmas & Blessed New Year all!


Almond Cherry Biscotti

Ingredients:
70 g butter
35 g caster sugar
35 g icing sugar
1/2 tsp vanilla eseence
1/8 tsp almond essence
1 egg
40 g ground almond
85 g cake flour
1/4 tsp baking powder
40 g red glaced cherries, sliced in halves
40 g green glaced cherries, sliced in halves

Method:
* Follow instructions as Cranberry Pecan Biscotti. Add in the ground almond together with the sifted cake flour and baking powder. Fold in the glaced cherries last.
* This dough spreads out alot during baking. Please allow plenty of room between doughs on baking pan.

Wednesday, December 15, 2010

Coconut Pandan Cake


I had some leftover coconut milk which needed to be used up and took the opportunity to make this coconut pandan cake which I've been eyeing for sometime. The recipe was meant for a swiss roll with kaya filling, but, as I didn't have kaya on hand, I decided to make a plain cake instead. This simple no frill  cake was soft, light and tender and had a pleasant subtle taste of coconut and pandan.

Ingredients

70 g superfine flour
1/4 tsp baking powder
20 g sugar
1/4 tsp salt

30g cooking oil
4 egg yolks
1/4 tsp pandan paste (I used the 'kopoe-kopoe' brand')
30 g coconut milk

4 egg whites
50 g sugar
1/2 tsp cream of tartar


Method:
1) Preheat oven to 180° C.
2) Sift superfine flour, baking powder and salt together, then mix  with cooking oil, egg yolks, pandan paste and coconut milk till well combined.
3) In another bowl, whick egg whites till frothy then add sugar & cream of tartar and continue whisking till stiff peak.
4) Mix 1/4 of the egg whites with the flour mixture to loosen the mixture a little, then add all the egg white and fold in well.
5) Pour into a round 8 inch lined baking tin. Bake about 30 minutes or until skewer comes out clean when tested.
6) Remove from oven and let cool for a few minutes before removing cake from tin to cool completely on rack. Done!

Note: Cake will shrink abit upon cooling.


Good enough to eat on its own....and wash down with a cup of tea.

Monday, December 13, 2010

Honey Sponge Cake


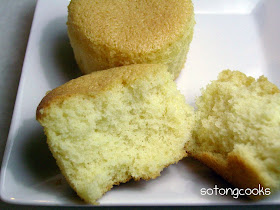
Spongy & sweet!


Followed the recipe from a video featuring the same Taiwanese lady instructor  for the vanilla sponge cake and chocolate sponge cake which I've made with good results. This recipe is also a keeper. I made cupcakes and they were moist, spongy and honey sweet. Good for a simple tea time treat.


Honey Sponge Cake
(This recipe is scaled down to fill an 8 inch square deep baking tin.)

Ingredients:
294 g  eggs (about 5 large eggs)
108 g sugar
24.5 g liquid glucose (about 1 tbs)
59 g honey
176.5 g low gluten flour
84 g vegetable oil
59 g milk
4 g salt

Method:
1) Preheat oven to 150 °C.
2) Using a mixer, whisk  eggs , sugar, liquid glucose, honey & salt till fluffy and thick.
3) Sift flour in to the egg mixture and fold in lightly in three batches till well combined.
4) In another bowl, take some batter and combine with the vegetable & milk, then pour back into the main batter. Mix well.
5) Pour in to a wooden mould lined with baking paper (use a baking tin if you don't have a wooden mould). Bake for 35-40 minutes or until skewer comes out clean when tested.

Note: I made medium sized cupcakes wich took about 20 minutes to bake. Maybe due to underbaking, the cupcakes somehow developed wet sticky tops after cooling, I had to toast them lightly to dry out the tops. I would suggest baking them a little longer next time.


Friday, December 10, 2010

Tangzhong Honey Wholemeal Rolls


Reading and following the many amazing food blogs, I have come to know a new method of bread making which has become the rage among asian bloggers who like baking their own bread at home. This new method of bread making which incorporates tangzhong was first introduced by Yvonne Chen who wrote a Taiwanese cookbook, entitled “65°C湯種麵包”(Bread Doctor). In her book, she claimed tangzhong “湯種” as the secret ingredient in making soft and springy bread.  Now what is tangzhong? It is a mixture by weight of 1 part bread flour and 5 parts water cooked over gentle heat until it has 'gelatinized' at a temperature of 65°C. This 'gelatinized' starch or 'tangzhong' traps and locks moisture from the water when cooked to  65°C , and thus produces a softer and more elastic bread dough  when used in bread making.


Springy, airy & moist.


Tangzhong
50 g bread flour
250 g water

How to make Tangzhong:
  1. Mix together flour and water until well combined  and without any lumps. Cook over medium-low heat, stirring consistently with a wooden spoon, whisk or spatula to prevent burning and sticking.
  2. Cook the mixture until it has reached the temperature of 65°C. (If you do not have a thermometer like me, keep an eye on the mixture; once the mixture has thicken and looks glossy, somewhat gelatinous and gluey, remove from heat). 
  3. Remove from heat. Transfer the mixture into a clean bowl and cover with a cling wrap. Let cool. The tangzhong is ready to be used. Store unused tangzhong in the fridge up to 3 days. Discard if it turns grey. 


Here is a recipe for wholemeal bread using tangzhong which I  have adapted and tweaked from 'Dodol & Mochi'  here . Instead of a loaf bread, I made rolls and added some figs to half of them and left the other half plain. Feel free to add whatever dried fruits or nut  you fancy.


Buns in the oven!
Tangzhong Honey Wholemeal Rolls

Ingredients:
280 g bread flour
200 g wholemeal flour                                                      
10 g instant yeast
25 g sugar 
1 tbs honey
5 g salt 
60 g egg
140 g milk
120 g tangzhong
50 g salted butter 

Method:
  1. Combine together brread flour, wholemeal flour, yeast, sugar & salt  and make a well in the center. Then whisk together honey, egg, milk & tangzhong and pour into the dry ingredients and mix till a dough has formed and pulls away from the sides of the mixing bowl. Add in the butter and mix till well incorporated.
  2. Knead the dough till it's elastic and has reached the windowpane stage--i.e. a thin "membrane" can be formed by slowly, gently pulling and stretching out a small piece of the dough. It might take longer for the stickier wholemeal bread dough to reach this stage compared to plain white bread dough.
  3. Round the dough up and place it into a greased bowl, cover and let it proof about  1 hour or till it's doubled in size. 
  4. On a lightly floured working surface, knead and divide the dough into 16 equal portions (I've added chopped dried figs to half the rolls at this point), then round up and cover them to let rest for 15 minutes.
  5. After resting, lightly flour your hands, if necessary, reshape the dough portions into tightly rounded balls and arrange them on a greased baking pan and leave to rise until doubled in size for about 1 hour.
  6. Bake in a preheated oven at 180 °C for 20 minutes. Done!

 
Good eaten with lashings of butter!


Wednesday, December 8, 2010

Chocolate Chip Cookies


In all my years of home baking, I bake cookies the least as compared to cakes and breads. Cookies somehow just don't excite me as much, they just don't have that show-stopper appeal in the final outcome as compared to beautifully iced cakes and tall golden breads and I just find them tedious to make. Yes tedious ... strange right?

Anyway, my Daughter  has been suggesting and bugging me to bake chocolate chip cookies for some time now and I finally gave in, after all it's the school holidays now and it'd be great to spend some quality time together doing something that's fun for her instead of her gluing to the computer the whole time. This is a rather simple chocolate chip cookie recipe I found here. I find that this recipe can go both ways for crunchy cookies or the soft centered chewy types, depending on your preference, you just have too adjust the baking time.


Chocolate Chip Cookies
(makes about 30 small & 6 large cookies)
Ingredients:
125g butter, softened
90g caster sugar
90g light brown sugar
1/2 teaspoon vanilla extract
1 egg
150g self-raising flour
150g plain flour
250g bitter-sweet chocolate chips (I used a combination of bittersweet and white chocolate chips)

Methods:
1. Cream butter and sugar till light and fluffy.
2. Add egg and vanilla extract and beat well to combine.
3. Mix in the flour then fold in the chocolate chips. (At this point, I have divided the dough into 2 portions to make two type of chocolate chip cookies, one with bittersweet chocolate chips and the other white chocolate chips).
4. Roll cookie dough into balls and place on lightly greased tray. Flatten and bake in preheated oven 175 deg C for 12 to 15 minutes. Cool and store in air-tight container.

Note: I find that I need to bake a lot more longer than the baking time stated to produce crunchy cookies. At 15 minutes baking time my cookies turned out soft & chewy in the middle with slight crispness on the edges.


Saturday, December 4, 2010

Chocolate Sponge Cake


After trying the sponge cake recipe with much success, I was encouraged to try out the chocolate version also from the same Taiwanese lady instructor.


Spongy and springy, the result didn't disappoint at all. It's great success!


I'm so satisfied with  how well the chocolate sponge cake turned out, I'm beginning to think I'm good at making sponge cakes now. LOL!


Ingredients:
203 g eggs (about 3 and 1/2 eggs)
32 g yolks (about 1 and 1/2 yolks)
135 g caster sugar
21 g liquid glucose (about 1 tbs)
1g salt (about 1/4 tsp)
32 g vegetable oil
21 g cocoa powder
106 g cake flour
1 g baking soda (about 1/4 tsp)
21 g milk

Method:
1) Preheat oven to 170°C prepare an 8 inch  round baking tin with removable base.
2) Gently warm up vegetable oil, mix in the cocoa powder. Set aside.
3) Whip eggs, yolks, caster sugar and salt at high speed until sugar dissolved. Add in the liquid glucose and continue whipping till ribbon stage. (Very important!)
4) Sift in  flour and baking soda, mix at medium speed for 20 seconds until just combined.
5) In another  bowl, take some batter and mix with the cocoa mixture until well blended. Pour back into the batter together with the milk and combine.
6) Pour batter into tin and bake for 35 minutes or until cooked when tested with a skewer. Remove from oven and cool upside down on a wire rack. Once cooled, remove cake from tin. Layer with your favourite filling or just eat it plain, it's just as good.


The Taiwanese video clip.

Tuesday, November 30, 2010

Vanilla Swiss Roll


Vanilla Swiss Roll
Recipe taken from "Elegant Swiss Roll" by Kevin Chai.

Ingredients:
4 eggs
70g caster sugar
1/4 tsp vanilla essence
80g plain flour (sifted)
50g butter (melted)

Method:
1) Preheat oven to 200 °C. Grease and line a swiss roll pan (8x12 inch).
2) Using a mixer, whisk eggs and sugar untill light and fluffy. Fold in sifted flour.
3) In a separate bowl, take small portion of the batter and mix with the melted butter. Then pour back into the main batter and combine well.
4) Spread mixture into tin and bake 8-10 minutes until cooked. Leave to cool.
5) Turn cake out onto a clean sheet of baking paper. Spread with your choice of filling. (I filled mine with buttercream and jam). Roll up. Done.  


Wednesday, November 24, 2010

Steamed Chicken Wings with Cincaluk


I was looking for ways to finish off my bottle of left-over cincaluk and saw a recipe for Steamed Chicken with Salted Fish in a cookbook  and thought of substituting the salted fish with cincaluk. Turned out quite good.

Ingredients:
about 600g Chicken Wings
thumb size Ginger, slivered
1 Tbs Oyster Sauce
1Tbs Cincaluk
1 Tbs Soy Sauce
1 Tsp sugar
few drops sesame oil
1 Tsp cornflour


Method:
Mix all ingredients together and allow to marinate for 1/2 hour. Steam on high heat for 15 - 20 minutes till cook through. Done.

Sunday, November 21, 2010

Old-Fashioned Butter Cake


Traditional butter cake made into small bite size cupcakes. Recipe is taken from the blog "A Daily Obsession". As usual, I succumbed to the beautiful pictures that tempted me to try out the recipe.


Tender, fluffy and sponge cake like, these bite size buttery cupcakes were gone in mere two days in my small family of 3. No prizes for guessing who whacked most of it. My Daughter said to me, "Can you make some more? They're really good .... and addictive!".


Adapted from A Daily Obsession here. I've scaled down the recipe enough for my family's consumption.

Ingredients
120 g chilled butter
90 g chilled caster sugar
3 large eggs, separated
110 g self raising flour, sifted
20 ml milk
a pinch f cream of tartar

Method:

1) Line muffin pan with paper cups. Preheat oven at 170 C.

2) Beat butter and 60g sugar by machine until light and fluffy, scraping down the sides a few times. Check to see if sugar has dissolved before going to next step.

3) Add the yolks one by one, beating well after each addition and then add the milk.

4) In another bowl, whisk egg whites with remaining g sugar and a pinch of cream of tartar until soft peaks.

5) Fold in the egg whites and flour into the butter mixture, alternately, in 2 or 3 batches.

6) Pour batter into prepared prepared muffin pan and bake until wooden skewer plunged into middle of cake comes out clean. Please note the cooking time and the number of cupcakes this batter yields, varies depending on the size of your cupcakes. Keep your eyes glued to the oven!


Monday, November 15, 2010

The Almost Perfect Sponge Cake


I have been baking since I started this hobby some 8 years ago and can be considered an intermediate level home baker but even till now, I still have a  fear for making sponge cakes. This is what would usually happen, the cakes would look beautifully puffed and tall in the oven but once cooled they'd collapse or shrink forming deep crater.... shrinking my confidence at the same time. Even when some do come out successfully  tall and beautiful, the texture inside would be either coarse or dry. Due to these  factors,  I am quite disheartened of ever making the perfect sponge cake, the holy grail of all sponge cakes, one that is made without the artificial aid of stabilisers and chemicals, has a texture which is fine, soft, tender, light, fluffy, airy and spongy, hold its shape well and most importantly moist.


Recently while scouting for a new sponge cake recipe from the net, I found an interesting video on sponge cake making through a link from this blog "Happy Flour".  At first I thought it would just be another run-of-the-mill cake demo, and boy was I in for a surprise. In the video, after having beaten the eggs with sugar till thick and fluffy and doubled in volume, the lady instructor dumped the whole batch of flour onto the whipped eggs and  she proceeded with mixing using the hand held beaters. Yup, HAND HELD BEATERS! It defied the age old mantra where light handedness is of utmost importance when it comes to folding in flour in order not to break up the air bubbles. I was shock to see such man-handling. Then the shock turned into intrigue and I just had to try out this recipe no matter what.


I did exactly the same as the lady instructor in the video and man-handled the batter. And here's my result. It's the most successful and best looking sponge cake I've ever made on first  try and it didn't collapse or shrink at all! The sponge cake was very airy, spongy and springy. I am very satisfied with the outcome  except for one teeny tiny thing... it was just a teeny tiny tad dry, which also made it just a teeny tiny tad shy from being THE perfect sponge.


However much I wish, alas this sponge cake is still not the elusive perfect sponge I'm looking for as I like my cake moist and this sponge is lacking it. Nevertheless,  this problem can be somewhat remedied by layering the sponge with cream or by sprinkling with some syrup. But still, not perfect.


I split the sponge cake into two layers  and sandwiched them with buttercream icing (recipe also taken from Happy Flour here).


Vanilla Sponge Cake
Recipe adapted from Happy Flour here. The recipe has been scaled down from the original from the video.

Ingredients:
3 eggs
125g caster sugar
1/4tsp salt
100g cake flour
22g vegetable oil
22g milk
1/4tsp vanilla essence (original recipe from video uses vanilla powder which is to be sifted together with the flour)


Method:
1. Preheat oven to 180 Degree Centigrade.
2. Sift the flour and vanilla powder together and set aside. (I didn't have vanilla powder)
3. Use a  mixer to whisk the eggs, salt and sugar until very thick and fluffy.(Very important!)
4. Take the sifted flour and dump the whole lot onto the whisked eggs. Mix well quickly using the mixer. (Dare u to do this, if not, fold  in the flour in batches. LOL!)
5. In another bowl, mix milk and oil together (I added the vanilla essence at this point).  Then, scoop some batter from the egg mixture and combine together. Pour back into the egg batter, mix well using a spatula.
6. Pour the well combined batter into the cake tin (I used a 7 inch round tin and there's no need to grease or line with paper) and bake in preheated oven for 25-30mins.
7. Remove cake tin from oven and invert the tin (with the cake still intact) on a wire rack and let cool. Once cooled, remove cake from tin.


The ALMOST perfect sponge cake.