Showing posts with label Cookies. Show all posts

Friday, February 3, 2012

Chinese New Year Cookies Galore

Hello! It's been some time since I've updated this blog. I've been away to my Hubby's hometown to celebrate the Chinese New Year festival with my in laws. It was good catching up with family members, old and new. Now that the celebrations are over and I'm back to my usual routine ....and also couple pounds heavier, I'm happy to have finally found some time to blog again. 

 
Here are some pics of the Chinese New Year cookies I've made.
  

I was going to pass making pineapple tarts this year but a trip to the market changed my mind. Pineapples were just so abundant and very fresh. Besides, Chinese New Year just wouldn't feel complete without some homemade pineapple tarts. I tried out a new pineapple tart pastry recipe from an old magazine and I'm happy to say I found THE one! For now that is. Until I find a better one, this recipe is what I'll be sticking to.  I like how the texture of the pastry is very short, buttery and milky tasting. It didn't leave that awful floury aftertaste like other recipes I've tried.  I suspect cornflour might be the culprit. This because all the recipes which had the floury taste had cornflour. Just my thought. What do you think?


Pineapple Tarts

Pastry:
180g unsalted butter, softened
70g caster sugar
1 tsp vanilla
300g all purpose flour
50g milk powder
1 tsp salt
1 egg
1 egg, beaten for egg wash

Pineapple Jam Filling:
Recipe here


Method:
1) Beat butter, sugar, salt and vanilla extract until fluffy and light. Sist the flour and milk powder together, and stir into the creamed butter. Add in beaten egg, mix until dough comes together. Cover with cling wrap and chill in the fridge for 2 hours until the dough is firm.
2) Preheat oven 170C. Divide into balls and wrap in the pineapple filling. Roll into balls and insert a clove on top each balls. Brush with beaten egg.
3) Bake 15 minutes or until pastry is golden brown. Cool completely and store in airtight container.

Note: I was too lazy to  make balls and made rolls instead. I made a couple pieces of balls and they were really good, better than the rolled ones I must say.  I like how the pastry is nice and thin and evenly distributed, enrobing the pineapple filling. Make the balls if you're not lazy. It's worth the effort.


Utterly rich and artery busting, not for the health conscious! Hence, this is only a once-a-year affair. My Daughter G absolutely loves these balls.


Crispy crunchy Walnut Cookies
Recipe here.
Added chopped walnuts instead of almond.

Thursday, March 31, 2011

Custard Powder Cookies


The other day, in between dinner preparations,  I had a sudden crazy urge to bake. I was in the mood and needed to bake something. Something simple would do. I pulled out my tattered little recipe notebook and found this Custard Powder Cookies recipe. Easy and quick, these golden yellow cookies were churned out  in no time at all. Of course I cheated a little, I  had free child labor to help me. My Daughter G enjoyed doing all the rolling and shaping of the cookies. Good for her and good for me. Haha!

My dear Hubby liked the cookies a lot and thought they were butter cookies. Again and again I've repeated to him, "No, they're custard cookies!" Yet he still calls them butter cookies. Well, they were indeed buttery. And with a sandy texture that melts into a paste in the mouth, they remind me of a lighter version of shortbread.

Do give this recipe a go when you find yourself wondering what to do with your stash of custard powder. Let me know whether  this makes custard cookies OR butter cookies. You be the judge. Let's see who wins.


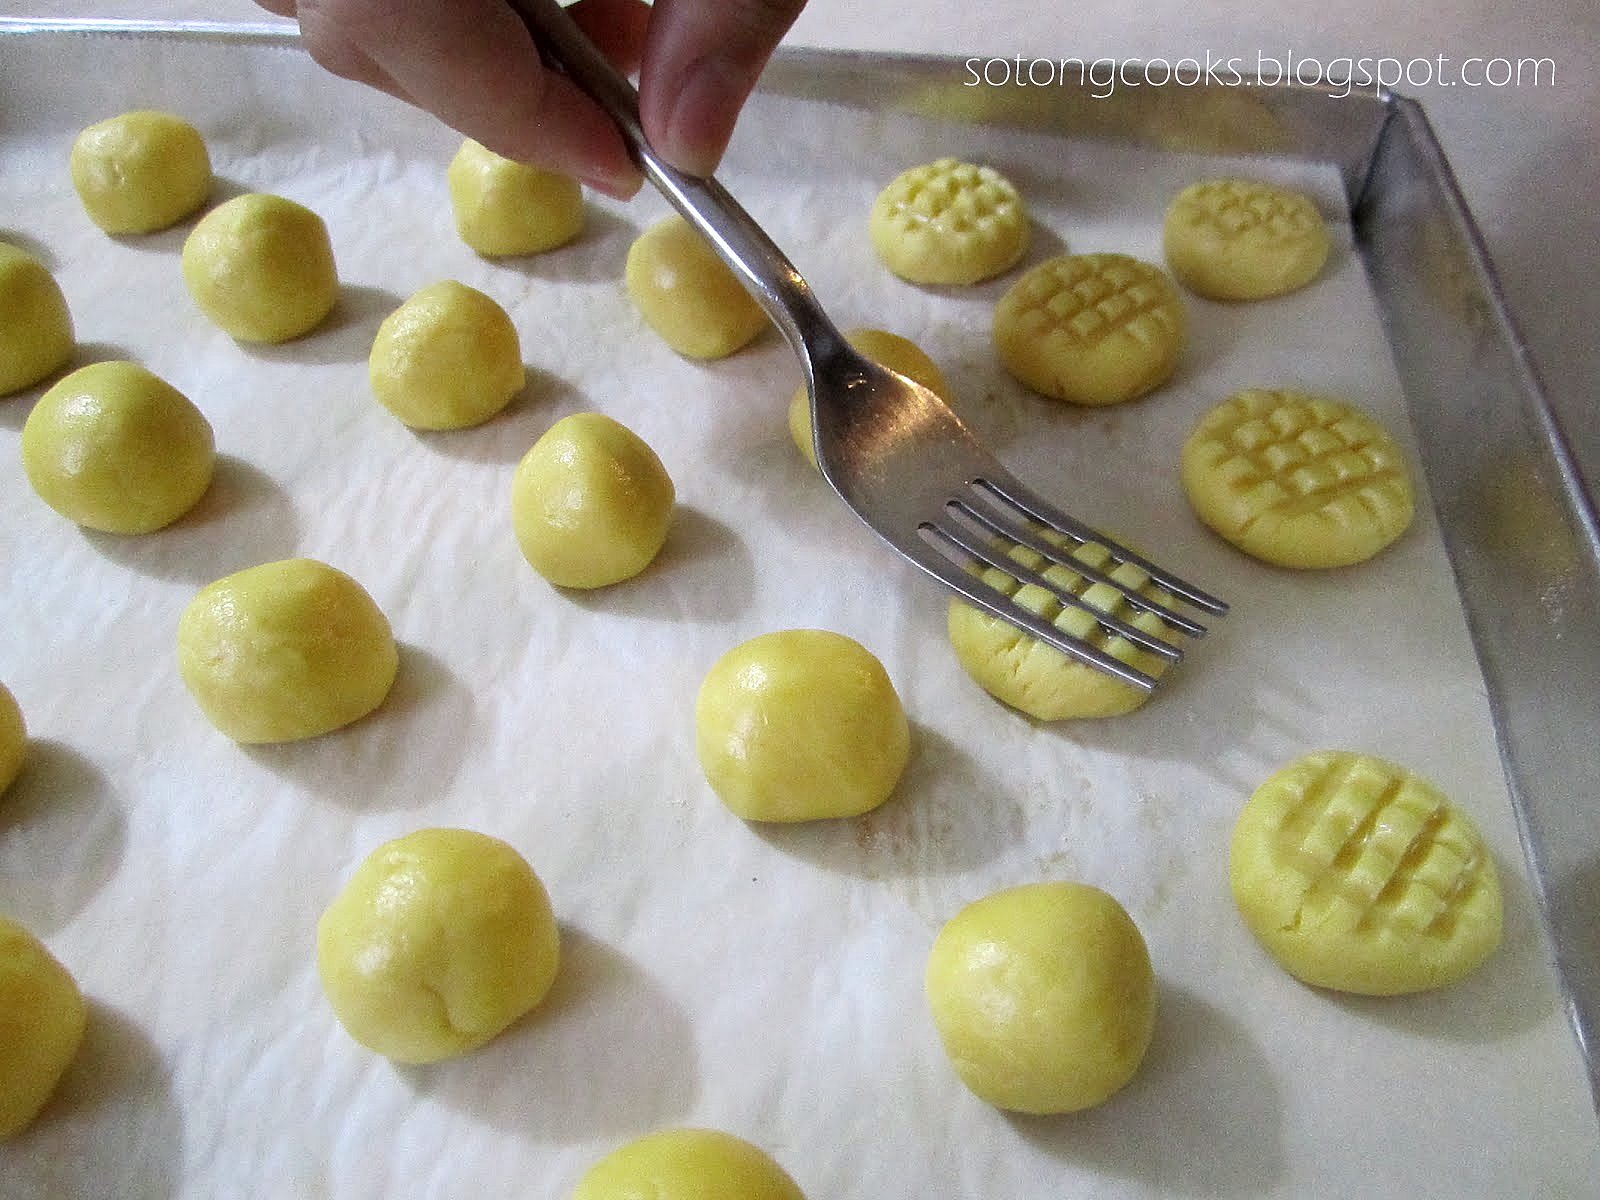
Press down criss cross.

Custard Powder Cookies
(Recipe taken from 'Food, Fun & Farm Life' here)

Makes 90 cookies.

Ingredients:

100 gm Icing Sugar
100 gm Custard Powder
300 gm Plain Flour
300 gm Butter


Method:

Don't they look like mini corn hobs? :)
Beat butter and icing sugar together till pale & fluffy. In another bowl, sift custard powder and plain flour together, then mix  into the butter mixture until just combined. Shape dough into small walnut sized balls. Place on a greased or lined baking tray. Dip fork in water, press down to flatten slightly. Bake at 200 °C for 10 to 15 minutes. Once cooled, dust with icing sugar if you like.

Wednesday, March 2, 2011

Blueberry Hearts


A quick bake using a batch of cream cheese dough leftover from the Pineapple Tarts here. Topped with blueberry jam, these delicious little hearts were very addictive. It was impossible to restrain myself to just one piece. I had another and another and another ... until the guilt sank in! By then I had probably eaten 10 pieces. To heck with calorie counting! Haha!


Just as good plain!


Tuesday, March 1, 2011

Self imposed challenge - Pineapple Tarts!

This post was originally planned to be published during the Chinese New Year season. Ah well, better late than never. Haha!

Here's my crazy self- imposed challenge in making pineapple tarts from scratch. All in all I've made 3 batches of pineapple jam and tried 4 pastry recipes for the tarts! Talk about madness!


Cooking my first ever batch of pineapple jam, it wasn't as hard as I imagined it to be and I enjoyed inhaling the heady aroma of spices (cloves & cinnamon) and sweet pineapple lingering throughout the house. I've got to say, the hardest part in making homemade pineapple jam was peeling the thick skin and digging out the eyes from the pineapples, more laborious than grating and cooking itself! 


I'm very pleased with the final outcome of my pineapple jam. Not too bad for a first timer eh? Dry and sticky enough for rolling into balls and fibrous enough like how traditional pineapple jams should be.  It was also not too sweet with some pineapple tang just the way I like it. This pineapple jam recipe adapted from 'Food-4-Tots' is a keeper! 


Pineapple Jam

Ingredients:

2 half-ripe pineapples, grated
200g granulated sugar (adjust according to your preference)
4 cloves
1 cinnamon stick (5 cm long)
1 tbsp lemon juice

Method:
  1. Skin pineapples and remove the “eyes”. Cut each pineapple into quarters lengthwise.
  2. Grate the pineapples until the core (the tough centre). Discard the core.
  3. Cook the grated pineapples, half portion only of the sugar, cloves, cinnamon sticks and lemon juice in a large heavy bottom pot under moderate heat until it begins to boil.
  4. Reduce the heat to medium low and continue to cook, stirring occasionally.
  5. When the mixture start to look almost dry, reduce the heat to low. Add the remaining sugar bit by bit until the desired sweetness is achieved. Keep stirring until the mixture is sticky and caramelized with a golden-hue. This will take about 1 hour or more (or less if you use a very wide pot).
  6. Remove cloves and cinnamon stick. Set aside to cool. Store in an air-tight container.


Here's my stash of baking tools all ready for making the pineapple tart pastry. I couldn't decide which type of pineapple tarts to make - the open faced ones or the rolled ones or the enclosed covered ones. In the end, I made all 3 types! Haha!


The rolled type also known as Nastar. I used Agnes Chang's recipe. The pineapple rolls somehow deformed after baking (though they looked pretty fine because I took pictures of the better looking side!). Tastewise the pastry was very short and melt-in-the-mouth but was bland eventhough I used salted butter and it has a slight floury taste which bugged me. 

Agnes Chang's Pineapple Tart Pastry Recipe
(Taken from her book, "Baking Made Easy")

Ingredients:

250 g unsalted butter (i used salted butter)
50 g icing sugar
2 egg yolks
360 g plain flour
2 tbs custard powder
1/4 tsp salt (omitted this)

Method:
  1. Preheat oven at 160°C. Line a baking tray with baking paper.
  2. Cream butter and icing sugar until light.
  3. Beat in egg yolks, one at a time.
  4. Add in salt and beat until fluffy.
  5. Fold in sifted ingredients in bathches and mix into a firm dough.
  6. Leave aside for 30 minutes.
  7. Put the dough into a pineapple roll pastry press/mould, and then press out into a strip of 5cm length.
  8. Place pineapple filing at one end and roll up the pastry, as in a Swiss roll, enough to enclose the jam. Do not overlap the pastry. Cut off the excess pastry.
  9. Put the rolls on the baking tray. Brush with egg wash.
  10. Bake in preheated oven for 15 minutes and turn the baking tray 180 ° and continue to bake for 2 minutes or until golden brown.
  11. Leave to cool before storing.


I made the enclosed type using this rich pastry recipe which calls for cream AND cream cheese from 'Table for 2 or More' here.   The inclusion of cream indeed gave a very fragrant dairy aroma and the cream cheese though not so prominent gave the pastry some edge which was really delicious and the pastry was very very tender. I couldn't stop myself from eating the remnants of raw dough stuck to my mixer paddle. It was so good. Handling the dough was a nightmare though. It was really really soft and took a lot of time, and if handled too much it oozes oil; this knocks off some brownie points for this recipe.  I've also added 1/4 teaspoon salt for more flavour. I'd suggest chilling the pastry dough in the fridge and only take out a portion at a time when shaping the tarts.


The open faced tarts. Recipe taken from 'Greg & Nee' here. This is the simplest pastry recipe amongst all. The result was very short & melt in the mouth fresh out of the oven but once cooled down and kept overnight it wasn't so.


These are made from using Amy Beh's recipe copied from 'My Culinary Journal' here. This recipe is meant for the rolled type (Nastar) but I wanted to experiment to see whether it can be used for open-faced tarts. The dough was very soft and it must be chilled to firm up before rolling between 2 sheets of clingfilm or wax paper. Quick hands were indeed required as the dough softens quickly once rolled out!


Sunday, February 13, 2011

German Potato Cookies


These cookies have been popping up in blogs everywhere lately and being 'kiasu' (a Hokkien phrase which literally means scared of losing out) I didn't want to get left behind and  jumped in the bandwagon too! Haha!

Sandy, melt in the mouth and at the same time light & tender with a buttery potatoe-y taste. Reminds me of melting moments cookies.

Recipe taken from 'Small Small Baker' here.


Ingredients:

125g butter
40g icing sugar, sifted
125g potato starch
80g superfine flour

Method:

1. Beat butter and icing sugar till fluffy and pale in colour.
2. Sift in potato starch and flour, mix to form a soft dough.
3. Roll into small balls (about 2cm in diameter), arrange on lined baking pan and press lightly with a fork (dip the fork in water after each press to prevent cookie dough from sticking to the fork).
4. Bake in preheated oven at 170 deg C for 15 mins.

Saturday, January 29, 2011

Kuih Makmur @ Momo

My Hubby came home one day with a half-empty cookie container and raved about what contained inside. Handing over the cotainer to me, he said, "You gotta try these peanut cookies, they're mmmm ... so melt-in-the-mouth, they're really good..... sorry, these are what left".
I took a closer look . Peanut cookies NOT! They're KUIH MAKMUR! 


Kuih Makmur also known as Kuih Momo over here in East Malaysia, actually don't contain peanuts. The flour is pre-roasted  to impart a nutty aroma & flavour and one can mistaken as ground peanuts. These delightful icing sugar coated round buttery balls crumble and dissolve into a fragrant nutty paste once popped into the mouth. I've never actually come across anyone who doesn't like these morsels which are usually found during the festive season.

East Malaysian Kuih Makmur/Momo are by no means the same as the ones in West Malaysia. Those in West Malaysia are usually shaped like leaves, not round and has ground peanuts as filling and is coated with caster sugar on the outside.

Here's a keeper recipe for Kuih Makmur/Momo taken from "Sunflower Food Galore".


Kuih Makmur/Momo

Ingredients:
250g plain flour or all purpose flour
40g icing sugar 
75g full cream milk powder
150g ghee (I used QBB brand)
1/4 tsp salt
1 egg yolk
about 1/2 cup sifted icing sugar for coating
Method:
1) In a frying pan, dry fry plain flour at medium low heat for about 5 - 6 minutes. Keep stirring the flour to avoid burning till flour becomes very hot, smells lightly nutty and has turned a very light brown tinge. Remove from heat and leave to cool.
2) Using pestle and mortar, grind salt with 1 teaspoon of the dry roasted flour to a fine powder. Add this to flour.
3) Mix all the dry ingredients together, then sieve. Remove remaining gritty grains.
4) Melt ghee in microwave for about 20 - 30 sec. Beat in the egg yolk.
5) Pour ghee and yolk mixture into the dry mixture. Mix with a folk or spoon then finish by rubbing with fingers till dough is evenly mixed. The dough is crumbly but should form a lump when squeezed together.
6) Take a pinch of dough, squeeze to form a lump then lightly roll between palms into a ball about 2cm wide. Do this without exerting  pressure or it will crumble.
7) Place balls on baking tray lined with baking paper, leaving some space in between balls.
8) Bake in a preheated oven at  150 deg Centigrade for about 12 - 15 minutes till light golden. Momo balls will expand slightly after baking.
9) When the Momo balls are cool enough to the touch, coat generously with icing sugar. Do this gently as they are very fragile. Leave to cool completely.

Thursday, January 20, 2011

Almond Tuiles


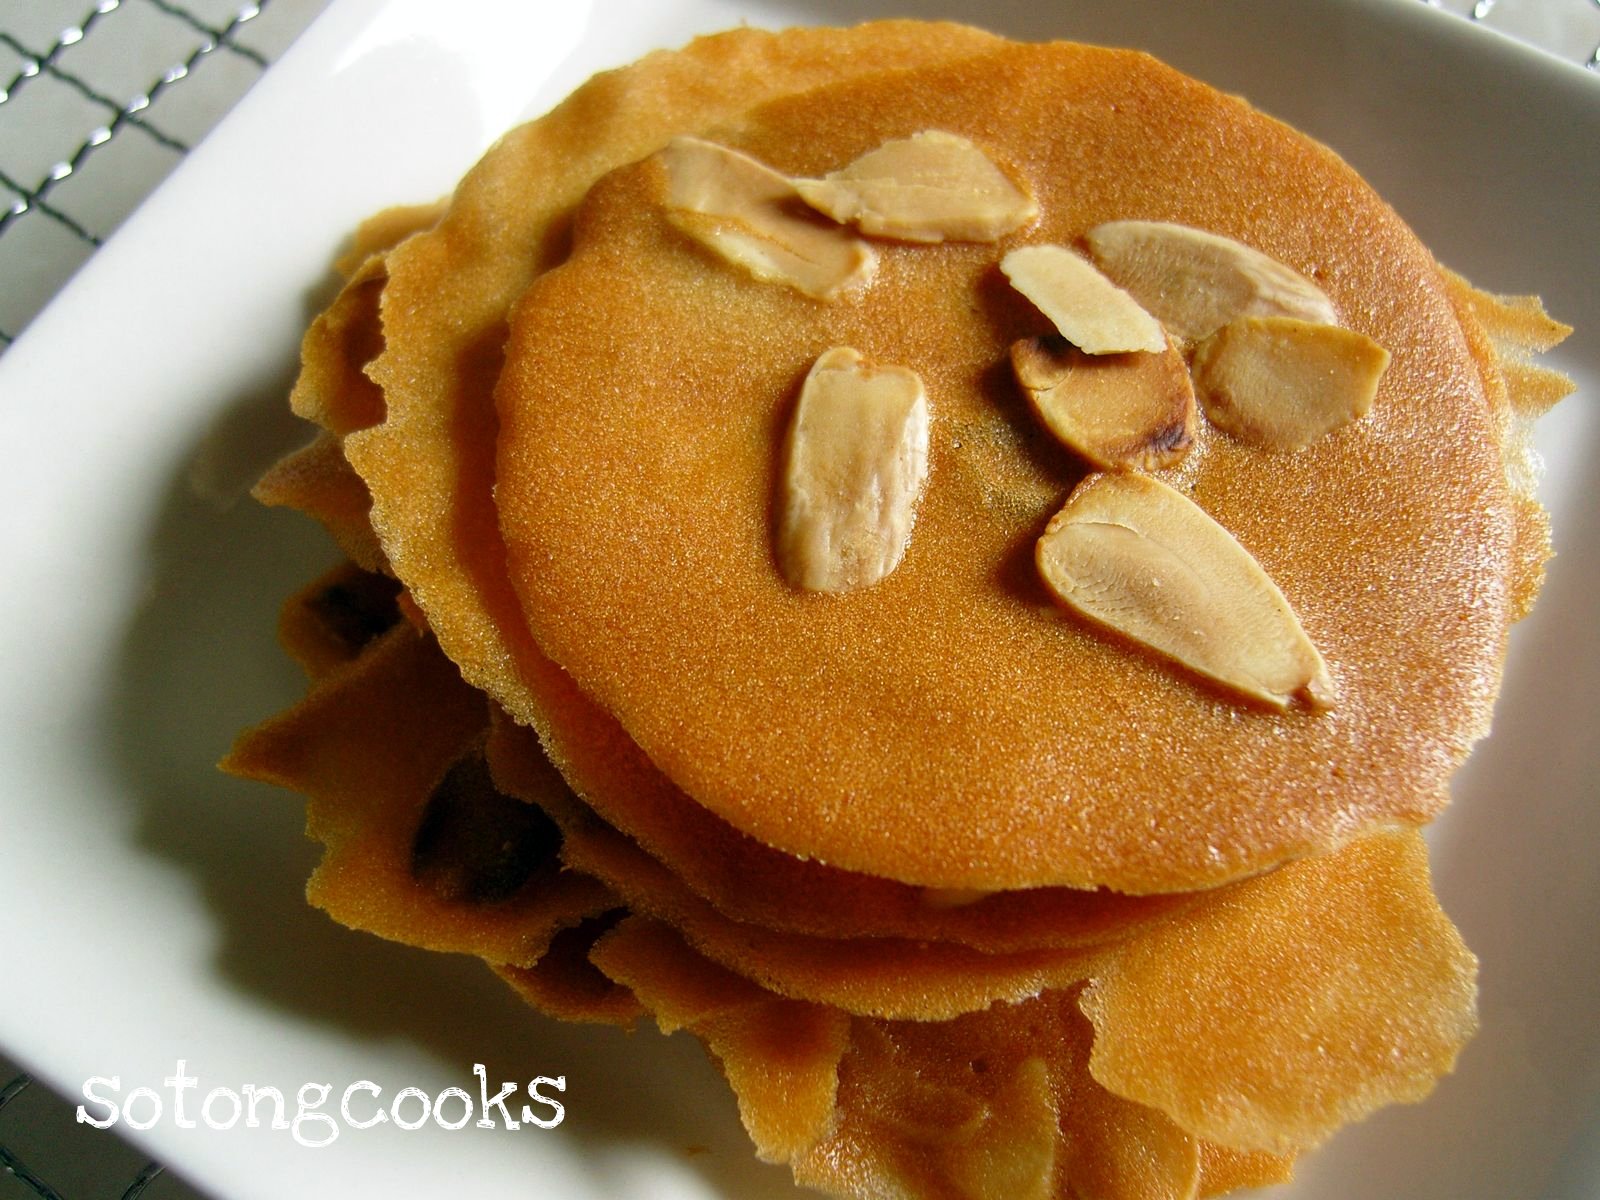
If you have lots of leftover egg whites and don't know what to do with them, do try this super thin and crisp almond tuiles to impress your family and friends (and yourself!). The recipe for the batter is a breeze to whip up with minimal ingredients, but I forewarn u first, this is a very time consuming recipe to bake!

To make these tuiles, you need to spread a thin layer of  round circles about 2 inches wide on a baking paper lined tray, and then sprinkle some flaked almonds on top before sending to bake. Each process makes only a few pieces at a time and need to be repeated until you've finished your batter. 


After about  a couple times of spreading -baking-cooling, I got tired & bored. I mixed the flaked almond with the batter and then spreaded the batter into a big rectangle instead. Once cooled, the big rectangular piece was broken into smaller random pieces (you can see from the photos the irregular shaped ones at the bottom). Of course, the round ones definitely look a ton better but if you don't mind and you're not a perfectionist, do try the short cut way.


ALMOND TUILES  
(Recipe taken from 'No Frills Recipes' here )

Ingredients
2 egg whites lightly beaten
60 gm caster sugar
2 Tbsp or 30 gm butter  (melted)
50 gm plain flour
1/4  tsp vanilla
Almond flakes/Pumpkin seeds (amount as desired)

Method
  1. Sift flour into a mixing bowl, add in sugar, mix well.
  2. Make a well in the centre, add in the melted butter, lightly beaten egg whites and vanilla.  Mix till well combined.
  3. Let batter rest for 30 mins.
  4. Drop 1 leavel teaspoon of batter onto a baking tray, lined with baking paper.
  5. Using the back of the spoon, slowly spread the mixture as thinly as possible to a circle about  2 inches in diameter.
  6. Sprinkle some almond flakes onto the centre of the batter.
  7. Bake in a preheated oven at 180 deg C for about 3 mins, or till lightly brown.  
  8. Let stand for a minute and carefully lift the biscuits from tray to cool on a wire rack.
  9. When completely cooled, store in an air-tight container or jar.
  10. Makes 34 pieces. 

Note:
  • I baked my almond tuiles at 160 deg C for about 20 minutes. At 180 deg C, my almond tuilles were not browned evenly. They were almost burnt at the edges and the middle still pale, undercooked and chewy. Please do a small test batch to find which temperature is suitable to you.
  • I used baking paper and didn't need to grease. The tuilles were easily removed while they're still warm. I used a pallete knife by sliding it underneath the tuilles, then lifting up from the baking paper.
  • I've lightly pre-roasted the flaked almonds  first for better aroma. I did this by dry-frying on a pan on the stove. Becareful not to burn! 


Super thin & crisp!

I'm submitting this post to Aspiring Bakers #3: My Favorite CNY Cookie (Jan 2011). Details can be found here.

Saturday, January 8, 2011

Almond Crunch Cookies


I have been eyeing this Almond Crunch Cookies recipe from one of my many favorite cookbooks, 'Baking Code' of the Alex Goh Baking Class series, but never got around to trying it. Well, honestly, cookies are not my forte .... too much repetitive work to handle for a lazy cook like me!


Baking time.
 Anyway, this month's Apiring Bakers Challenge hosted by Jess of 'j3ss kitch3n' is themed "My Favorite Chinese New Year Cookies". Good reason for me to pull myself out from my comfort zone and try out the recipe at last!


Hot out from the oven!

I divided the dough into 2 portions and added nibbed almonds to one and left out the other, as some like it crunchy & nutty and some don't!  As the name suggest, the cookies turned out very crunchy and crisp. I couldn't stop munching at just one. They taste somewhat like 'Hup Toh Soh'. Maybe I should rename them 'Almond Soh'!  


I'm submitting this post to Aspiring Bakers #3: My Favorite CNY Cookie (Jan 2011), details can be found here. If you're interested please feel free to join. Happy baking all! 
 

Almond Crunch Cookies
(recipe taken from 'Baking Code' by Alex Goh)

Ingredients
100 g butter
130 g sugar
1/8 tsp salt
1/4 tsp ammonia
1 egg
1/2 tsp vanilla essence
230 g plain flour
1/2 tsp baking soda
20 g ground almond
60 g nibbed almond

Note: I suggest toasting the nibbed almonds first prior to folding in, for better aroma.

Method:
1) Beat together butter, sugar, salt and ammonia till light and fluffy.
2) Add in eggs and vanilla essence, combine well.
3) Sift together plain flour, baking soda and ground almonds. Then mix with butter mixture.Fold in nibbed almond.
4) Pinch a small piece of dough about 10 g and shape into a ball. Place it onto a greased baking pan and flatten lightly. Do this again until you finish the whole batch of dough. Then, lightly brush the cookies with egg wash and decorate with whole shelled almonds on top.  
5) Bake at  170°C for 20 minutes or until lightly golden.

Wednesday, December 8, 2010

Chocolate Chip Cookies


In all my years of home baking, I bake cookies the least as compared to cakes and breads. Cookies somehow just don't excite me as much, they just don't have that show-stopper appeal in the final outcome as compared to beautifully iced cakes and tall golden breads and I just find them tedious to make. Yes tedious ... strange right?

Anyway, my Daughter  has been suggesting and bugging me to bake chocolate chip cookies for some time now and I finally gave in, after all it's the school holidays now and it'd be great to spend some quality time together doing something that's fun for her instead of her gluing to the computer the whole time. This is a rather simple chocolate chip cookie recipe I found here. I find that this recipe can go both ways for crunchy cookies or the soft centered chewy types, depending on your preference, you just have too adjust the baking time.


Chocolate Chip Cookies
(makes about 30 small & 6 large cookies)
Ingredients:
125g butter, softened
90g caster sugar
90g light brown sugar
1/2 teaspoon vanilla extract
1 egg
150g self-raising flour
150g plain flour
250g bitter-sweet chocolate chips (I used a combination of bittersweet and white chocolate chips)

Methods:
1. Cream butter and sugar till light and fluffy.
2. Add egg and vanilla extract and beat well to combine.
3. Mix in the flour then fold in the chocolate chips. (At this point, I have divided the dough into 2 portions to make two type of chocolate chip cookies, one with bittersweet chocolate chips and the other white chocolate chips).
4. Roll cookie dough into balls and place on lightly greased tray. Flatten and bake in preheated oven 175 deg C for 12 to 15 minutes. Cool and store in air-tight container.

Note: I find that I need to bake a lot more longer than the baking time stated to produce crunchy cookies. At 15 minutes baking time my cookies turned out soft & chewy in the middle with slight crispness on the edges.


Related Posts Plugin for WordPress, Blogger...